This post will help you with “how to create a free Blogspot website”, you don’t need to pay for hosting and domain name. Blogspot allows you to create a website well-designed. Blogger is a CMS (content management system) that allows you to manage your posts/articles easily by coding. If you are a beginner, this will help you much more. In this post, you will read all about the blogger or Blogspot.
Let’s start Creating a Free Blogspot website
1. Sign up or log in to Blogger
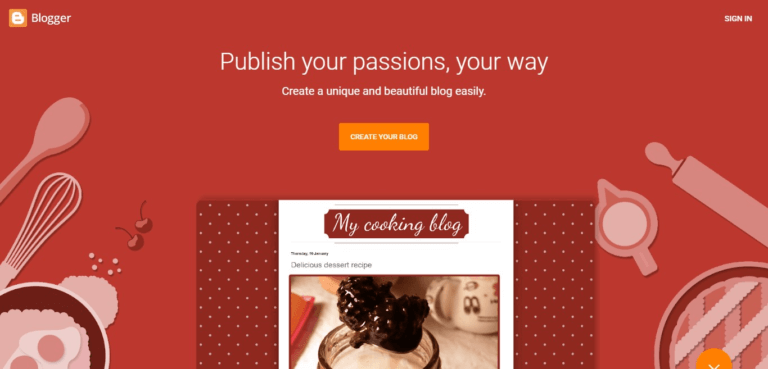
Open the site blogger.com and log in with your Gmail account, if you haven’t you’ll need to create a Google account. Blogger is a service provided by Google that’s why you need to sign in or log in with a Gmail account.
2. Enter the Website Title
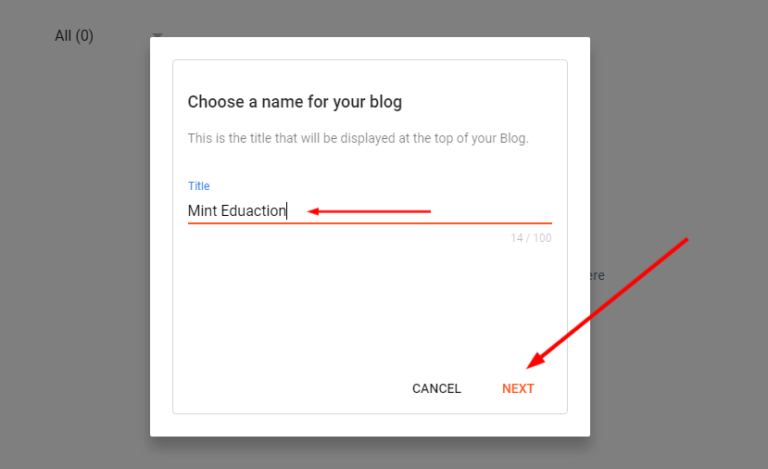
After logging into Blogger, you’ll get a new page similar to the image added below. Create a website or blog with a name that is best or unique for you and show your business or service. Enter the title you want, then click on Next.
3. Choose a URL Address or Domain name for Free Blogspot Website
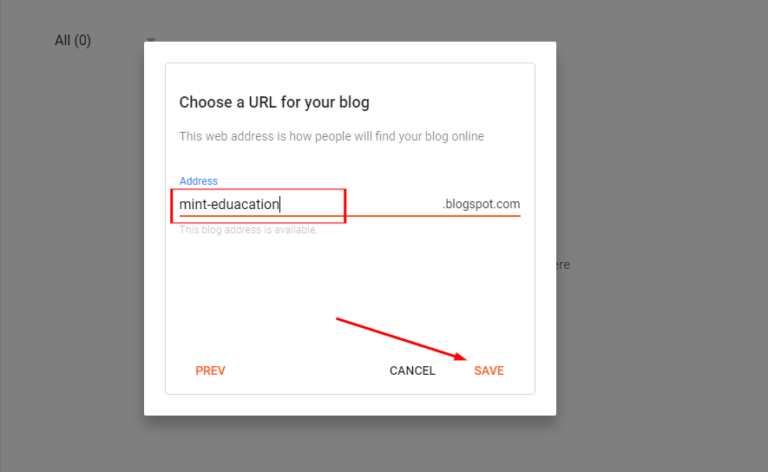
Include the title and URL of your website. For example, if you want to create a website for education your address may be mint-education.blogspot.com and your title could be Mint Education.
One thing to know about maybe the domain you’re finding is not available because these domain names are free and they will automatically be suffixed with blogspot.com. But Blogspot allows you to use a custom domain, instead of the free domain.
4. Install a theme
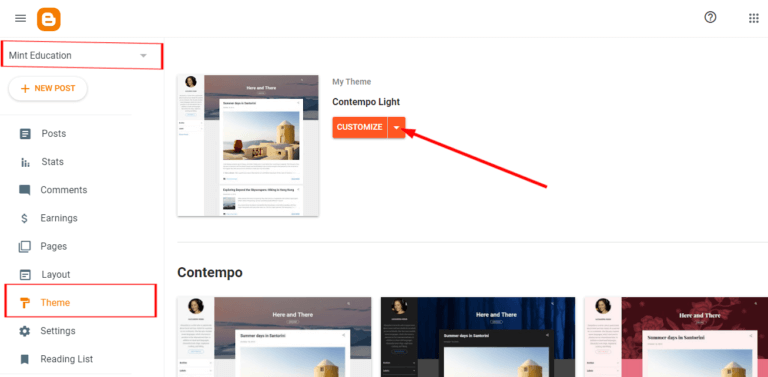
To change the theme of your site go to the blogger dashboard. First, select the site from the top on which you want to install the theme. Click on the “Theme” section which is left side.
Now you can choose the template that comes with a blogger or you can find beautiful themes from Gooyaabit Templates, Blogger Templates, Colorib, Themeforest, and many more sites providing blogger templates but maybe you find beautiful themes on these sites. Both free and paid themes are available on these sites except ThemeForest.
Steps to install custom theme In Blogspot
- Go to the Dashboard
- Select the site on which you want to change the theme
- Now you can install the default theme that comes with the blogger or you can download beautiful templates from the websites that I have mentioned above or other sites.
- Extract the Zip of the theme which you downloaded
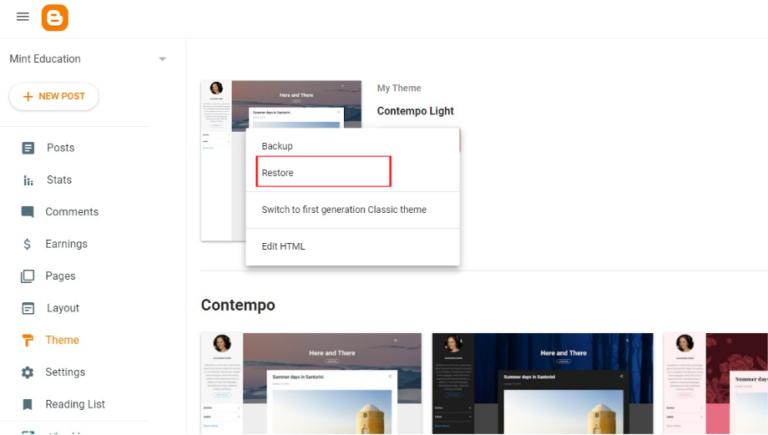
- Click on the arrow in the Customize Button
- Click on Restore
- Now upload your XML file and install it
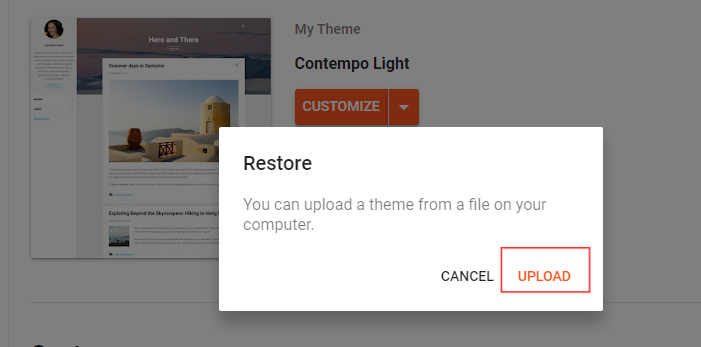
To customize the theme go to the blogger dashboard, and click on the layout section which is on the left side from there you can add and make changes to the site.
5. Add Important Pages
To add pages go to the Blogspot dashboard, click on the pages section here you will see both pages that you have published and drafted.
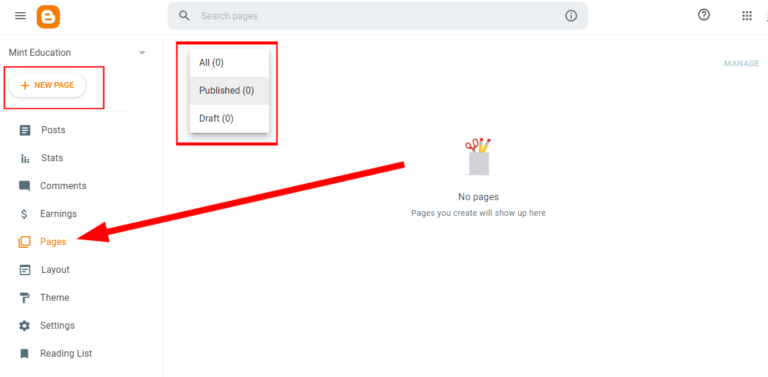
How to create/add more pages to the blogger?
- Go to the Blogger Dashboard
- Click on Page Section which is on the left side
- Click on the New Page button which is below the Page Title
- Enter the Page’s Title
- Now you can add the content
- Click on the Publish button to publish the page
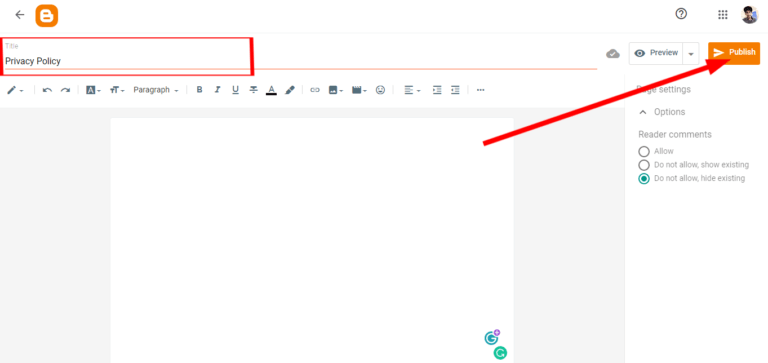
- Here you can allow or Do not allow comments on a page from the options below the page setting.
- To save the page as a draft click on the arrow icon which is on the right side of the preview button and click on save.
6. Add a new post to the blogger
To add posts go to the Blogspot dashboard, and click on the post section here you will see all the posts that you have published, drafted, and Scheduled.
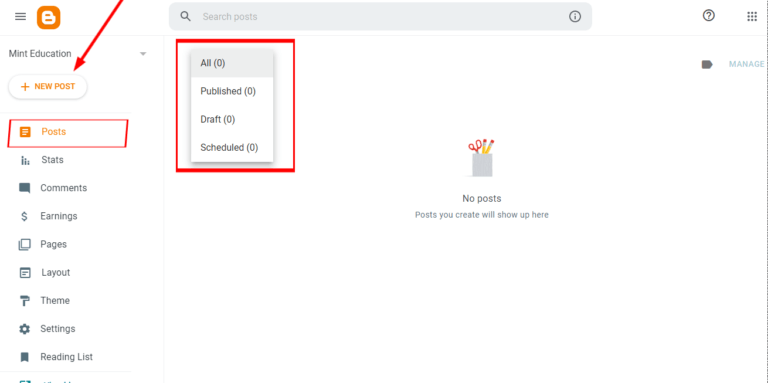
How to add more posts on the blogger?
- Go to the Blogger Dashboard
- Click on Post Section which is on the left side
- Click on the New Post button which is below the Page Title
- Enter the Page’s Title
- Now you can add the content
- Click on the Publish button to publish the post
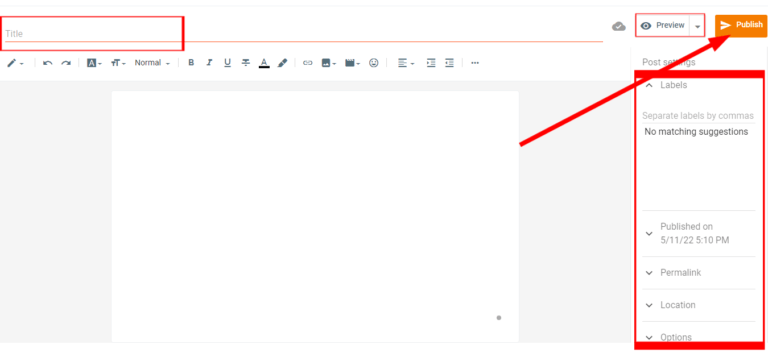
Check Additional Setting before publishing the post
- Labels – It is also known as categories which you can create differently for particular posts.
- Published on – From here you can schedule the post or publish it in real-time.
- Permalink – It is the option from where you can set it to default permalink or you can make a custom permalink for the post.
- Location – You can add the location from where you want to show it to the users.
- Options – From here you can allow or not allow comments for users.
7. Add custom Favicon to your site
The favicon is an icon or logo for each Web Page or Site associated with their company or service. To change it, go to the Setting section on the left side of the Blogger dashboard. It is a small feature that makes your site different and unique.
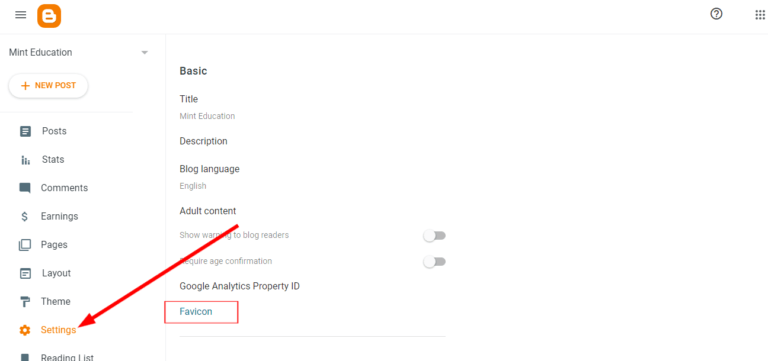
How to change the favicon of your site?
- Go to the Setting section in the blogger dashboard
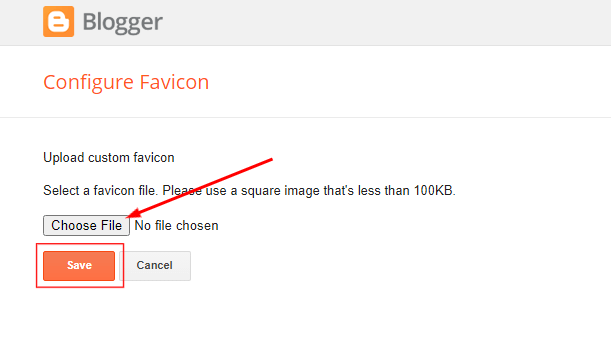
- Click on Favicon (You will be redirected to the new page ‘Configure’)
- Now choose the file (it must be less than 100 KB)
- Save it
8. Stats
This feature shows you whether traffic or views coming to your site or not. In this section, you can check details about the post or page views. The followers who subscribed to your blog all the posts you have published and the total comments on your site can be seen here.
Maybe you like:

